
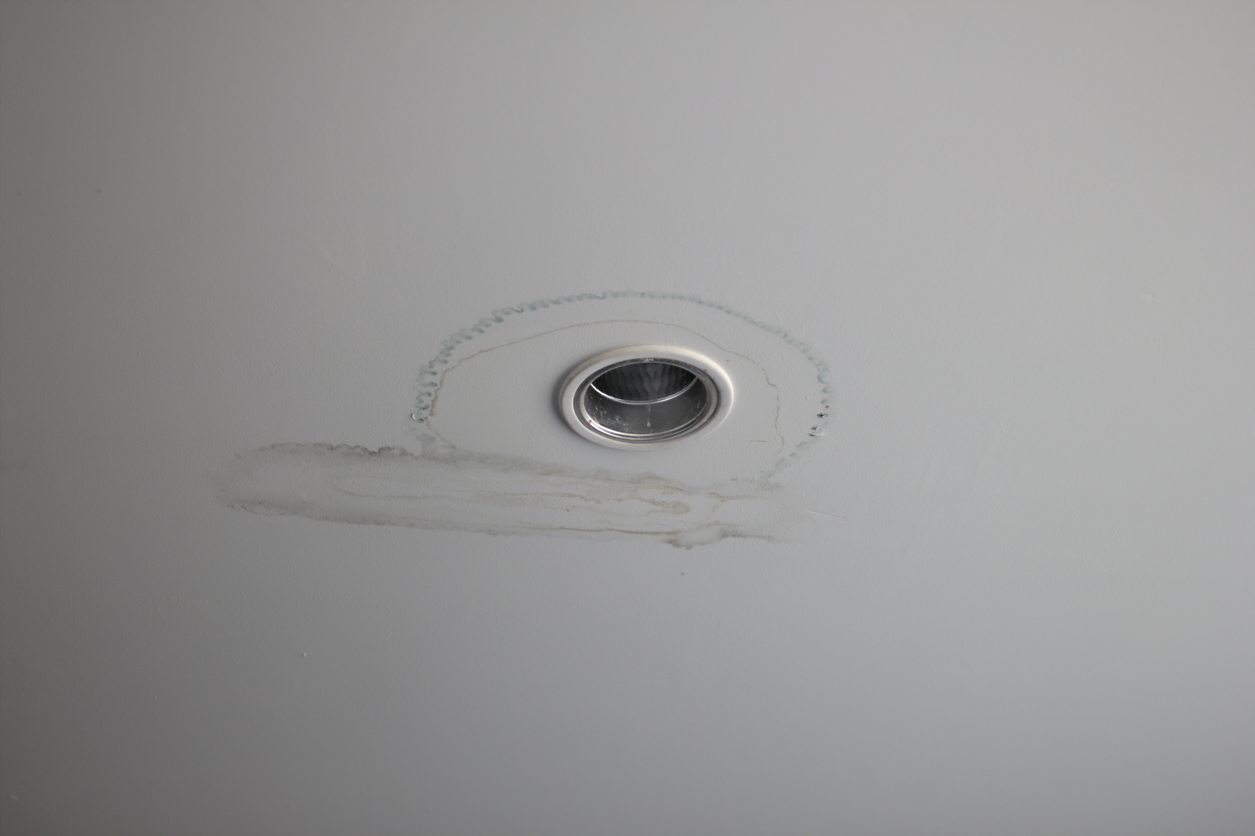
Water stains on the ceiling are one of the headaches of every Fremont area homeowner. They are often caused by leaks from plumbing, roofing, or condensation. These stains are unsightly and can be yellow, brown, or darker, indicating the presence of moisture. In some cases you may need to look at doing professional acoustic ceiling removal as well.
But homeowners need not worry. The problem is generally manageable as long as they address it immediately. Promptly solving the water stains problem can help prevent mold growth, structural damage, and further leaks. Ignoring the problem can lead to more extensive repairs and health issues due to mold and mildew.
Identifying the causes of the water stains
Common causes of water stains on ceilings
- Leaking roof: Damaged or missing shingles, flashing issues, or other roof damage can allow water to seep through and stain the ceiling.
- Plumbing issues: Leaks from pipes or fixtures above the ceiling can cause water stains. It can include leaks from bathrooms or kitchens located on the upper floors.
- Condensation problems: Poor insulation or ventilation can lead to condensation, particularly in areas like bathrooms or attics, resulting in water stains on the ceiling.
Fixing the underlying issue
1. Importance of repairing the source of the leak:
- Addressing the source of the water intrusion is crucial to prevent further damage.
- Simply covering the stain without fixing the cause will lead to recurring issues and potential structural damage.
2. Steps to ensure the problem is resolved:
- Inspection: Thoroughly inspect the roof, plumbing, and insulation to identify the exact cause of the water stains.
- Repair: Fix any roof damage, repair leaking pipes, and improve insulation or ventilation to address condensation problems.
- Test: Ensure the repairs have resolved the issue by monitoring the area for any signs of moisture before proceeding with cosmetic repairs.
Fixing the underlying issue is essential for a long-term solution, ensuring the problem doesn’t recur and cause further damage.
Tools and materials needed
Fixing ceiling water stains involves several steps. Each of these steps requires specific tools and supplies. Here’s a detailed guide on what you’ll need and how to use them:
Cleaning supplies
- Mild detergent: Use a mild detergent mixed with water to clean the affected area. Doing so helps remove any dirt or grease that might interfere with the repair process.
- Bleach solution: A mixture of bleach and water (usually 1 part bleach to 3 parts water) can help kill mold or mildew. Apply the solution and let it sit for 10-15 minutes before rinsing off.
- Water: This is used to rinse the cleaned area and dilute cleaning solutions.
Painting supplies
- Primer or sealer: It’s crucial to use a stain-blocking primer to prevent the water stain from bleeding through the new paint. Look for primers specifically designed for water damage.
- Ceiling paint: Choose a ceiling paint that matches the rest of your ceiling. Flat finishes are typically used for ceilings to hide imperfections.
- Brushes and rollers: Use a brush to cut around edges and a roller for larger areas. Choose high-quality brushes and rollers to ensure a smooth finish.
Protective gear
- Safety glasses: Protect your eyes from debris and cleaning solutions.
- Gloves: Wear gloves to protect your hands from chemicals and prevent skin irritation.
- Drop cloths: Use drop cloths to protect your floors and furniture from paint splatters and cleaning solutions.
Locating the source of the water stains
Locating the source of a leak that causes water stains on the ceiling can be a systematic process. Here are some steps to help identify the source:
- Inspect directly above the stain: Start by examining the ceiling directly above where the stain is located. Often, the water travels along beams or pipes before dripping down.
- Check plumbing fixtures: Inspect nearby plumbing fixtures such as toilets, sinks, and bathtubs. Leaks around these fixtures can often be the culprit.
- Look for roof leaks: If the stain is near an exterior wall, check the roof for missing shingles, damaged flashing, or other signs of water entry.
- Examine attic or crawl space: If accessible, look in the attic or crawl space directly above the stain. Water stains or mold growth in these areas can indicate the source.
- Check for condensation: Sometimes, especially in bathrooms, condensation can cause water stains. Ensure ventilation is adequate to prevent moisture buildup.
- Use a moisture meter: If you’re having trouble pinpointing the source visually, a moisture meter can help detect hidden moisture within walls or ceilings.
- Call a professional if unsure: If you can’t locate or fix the leak yourself, it’s advisable to consult a plumber or professional contractor who specializes in leak detection.
Steps to fix ceiling water stains

After locating and addressing the underlying cause of the water stains, it’s now time to fix the stains through by these steps:
1. Prepare the area:
- Remove any furniture from the area or cover it with drop cloths.
- Lay drop cloths on the floor beneath the stain.
2. Clean the stain:
- Mix mild detergent with water and clean the stained area to remove surface dirt.
- Apply the bleach and water solution to the stained area using a cloth or sponge. Let it sit for 10-15 minutes to kill mold or mildew, then rinse with clean water and let it dry completely.
3. Prime the stain:
- Once the area is dry, apply a stain-blocking primer/sealer to the affected area. Use a brush for small areas and edges and a roller for larger sections.
- Let the primer dry, following the manufacturer’s instructions.
4. Paint the ceiling:
- After the primer is dry, apply ceiling paint to the area. Use a brush to cut around the edges and a roller to cut around the main area.
- You may need to apply a second coat to ensure even coverage. Let the first coat dry completely before applying the next coat.
Additional tips
- Ensure proper ventilation when using cleaning solutions and paint to avoid inhaling fumes.
- If the water stain is due to an ongoing leak, fix the source of the leak before repairing the ceiling stain.
- Test a small, inconspicuous area first to ensure compatibility of the cleaning solution and paint with your ceiling material.
Alternative methods
Here are the alternative solutions to address ceiling water stains
Using a stain-blocking spray
Benefits of spray products for minor stains
- Convenience: Stain-blocking sprays are easy to use and require minimal preparation.
- Effectiveness: These sprays help seal stains and prevent them from bleeding through paint, ensuring a long-lasting solution.
- Quick drying: Many stain-blocking sprays dry quickly, allowing for faster project completion.
Application tips for best results
- Preparation: Clean the stained area to remove any dirt or loose particles. Ensure the surface is dry.
- Protection: Use drop cloths to protect surrounding areas from overspray. Wear a mask and ensure good ventilation.
- Application: Shake the can well and apply the spray in light, even coats. Start with a light coat and build up if necessary, allowing each coat to dry before applying the next.
- Priming: After the stain-blocking spray has dried, apply a primer before painting the ceiling to ensure uniform coverage.
Home remedies
Using vinegar or hydrogen peroxide solutions
- Vinegar: Mix equal parts white vinegar and water in a spray bottle. Spray the solution onto the stain and let it sit for about 15 minutes before wiping it off with a clean cloth.
- Hydrogen peroxide: Apply 3% hydrogen peroxide directly to the stain using a spray bottle or sponge. Let it sit for 10-15 minutes, then wipe it off with a clean cloth.
Effectiveness and limitations of home remedies
- Effectiveness: Vinegar and hydrogen peroxide can effectively lighten water stains, working well for mild to moderate stains. They also help disinfect the area, preventing mold growth.
- Limitations: These remedies may not be effective for severe or older stains. They may require multiple applications and might not prevent the stain from reappearing over time. They might not also be suitable for all ceiling materials, so most professionals recommend conducting a test spot.
Preventative measures
- After repairing water stains and painting the ceiling, it’s essential to take preventative measures to avoid future issues. Here’s a brief discussion of the steps:
Regular maintenance
- Checking for leaks and moisture issues regularly: Regularly inspect your home, especially areas prone to water exposure, to identify any leaks or signs of moisture early.
- Importance of timely repairs to prevent future stains: Addressing issues promptly can prevent minor problems from escalating into significant damage, saving time and money in the long run.
Improving ventilation
- Reducing humidity and condensation with proper ventilation: Ensure good airflow to minimize humidity levels, which can contribute to mold growth and water damage.
- Installing exhaust fans in high-moisture areas: Install exhaust fans in bathrooms, kitchens, and other areas where moisture is prevalent to expel humid air and reduce condensation.
Using water-resistant paints
- Benefits of water-resistant and mold-resistant paints: These paints are designed to withstand moisture and inhibit mold growth, providing a durable and protective barrier for surfaces.
- Recommendations for high-humidity areas: Use high-quality, water-resistant paints specifically formulated for bathrooms, kitchens, and other damp areas to ensure long-lasting protection and a clean appearance.
Common mistakes to avoid
Repairing water stains and painting a ceiling can be challenging, especially if you cannot avoid common mistakes. Here are some detailed points to consider for each common mistake:
Ignoring the source of the leak
- Risks of treating the stain without fixing the leak: If you don’t address the source of the water leak, the stain will reappear, and the ceiling might suffer further damage. It can lead to mold growth, structural damage, and additional repair costs.
- Ensuring long-term solutions by addressing underlying issues: Before starting any repair work, identify and fix the source of the leak. It could involve repairing plumbing, roofing, or other issues causing water ingress. Ensuring the leak is fully resolved will prevent future problems and make your repair work last longer.
Using the wrong products
- Importance of applying stain-blocking primers and appropriate cleaners: Regular primers and paints won’t effectively cover water stains. Use a high-quality stain-blocking primer to seal the stain and prevent it from bleeding through the paint. Clean the stained area with an appropriate cleaner to remove mold, mildew, or dirt before applying the primer.
- Avoiding products that can damage the ceiling surface: Some cleaners or primers may be too harsh for certain ceiling materials. Always read product labels and choose those specifically designed for your ceiling type. Test a small area first to ensure compatibility.
Rushing the process
- Allowing sufficient drying time between steps: Proper drying time ensures each layer adheres well and provides complete coverage. Follow the manufacturer’s recommendations for drying times between cleaning, priming, and painting.
- Ensuring thorough coverage with primer and paint: Apply primer and paint evenly to avoid streaks and completely cover the water stain. Multiple thin coats are usually more effective than one thick coat. Patience during the process will lead to a more professional and lasting finish.
Additional tips:
- Proper ventilation: Ensure good ventilation in the work area to help the primer and paint dry properly and avoid fume buildup.
- Using quality tools: High-quality brushes or rollers suitable for ceiling applications can be used to achieve a smooth finish without streaks or drips.
- Protecting surrounding areas: Cover floors, walls, and furniture to protect them from drips and splatters.
By addressing these common mistakes and following these tips, you’ll be better equipped to repair water stains and paint your ceiling effectively.
Conclusion
Addressing the water stain and the underlying issue on your Newark, CA home’s ceiling is crucial to ensure a long-lasting and effective solution. Ignoring the underlying cause can lead to recurring problems and potentially more extensive damage over time.
If you’re unsure how to proceed or want to ensure the job is done right, contact Custom Painting, Inc.’s seasoned paint experts. We have the expertise to fix the visible stains and address the root cause, providing you with peace of mind and a beautifully restored ceiling. Don’t hesitate to call us at 925-866-9610 or use our contact form to request a free, no-obligation estimate.
