
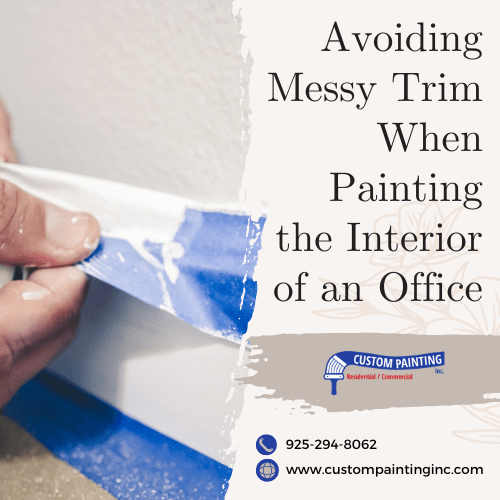
Painting the interior of a Fremont area office can transform the space, making it feel fresh and inviting. However, one common challenge is achieving a clean and neat trim. Avoiding messy trim requires careful planning, the right tools, and some practical techniques. In this article, we’ll provide you with essential tips and tricks to ensure your office painting project looks professional and polished, with sharp, crisp lines around every corner and edge. These insights will help you avoid the frustration of touch-ups and achieve a flawless finish.
Benefits of Neat Trim Work
Neat trim work brings several significant benefits to any interior painting project. Here are some key advantages of ensuring neat trim work:
- Professional Appearance: Neat trim work gives a polished and professional look to a Mountain View area commercial space. Clean lines and sharp edges create a finished appearance that can make a room look well-maintained and thoughtfully designed. This attention to detail can significantly impact the overall impression of the space, whether it’s an office, home, or commercial area.
- Enhanced Space Perception: Well-executed trim work can enhance the perception of a room’s size and structure. Clean trim lines can make walls appear straighter and more uniform, contributing to a more organized and spacious feel. This is particularly important in smaller offices where maximizing visual space is crucial.
- Improved Durability: Neat trim work can also contribute to the longevity of the paint job. By ensuring that paint is applied evenly and cleanly around the edges, you reduce the risk of peeling and chipping, which often starts at poorly painted trim areas. This means your paint job will last longer and require less frequent touch-ups.
- Easier Maintenance: Maintaining a space with neat trim work is much simpler. Clean lines make it easier to identify and address any wear and tear over time. When the trim is done properly, it’s also easier to repaint or refresh the space without extensive prep work, saving time and effort in the long run.
- Positive Impression on Clients and Visitors: In a professional setting, the appearance of your office speaks volumes about your business. Neat trim work can contribute to a positive first impression, signaling that you pay attention to details and take pride in your workspace. This can enhance your business image and make clients and visitors feel more comfortable and confident in your services.
- Increased Property Value: For both residential and commercial properties in Santa Clara, neat and well-executed trim work can add to the property’s value. Potential buyers or renters often look for spaces that are move-in ready, and a clean, professional paint job is a significant part of that appeal. Quality trim work can make a big difference in how a property is perceived and valued.
- Boosts Employee Morale: In an office environment, a well-maintained and attractive workspace can boost employee morale and productivity. Neat trim work contributes to a pleasant and professional atmosphere, making employees feel more comfortable and motivated. A well-kept office can foster a sense of pride and satisfaction in the workplace.
By investing in neat trim work, you not only enhance the visual appeal of your space but also enjoy practical benefits that improve the overall quality and longevity of your paint job. Whether you’re repainting an office, home, or commercial property in San Jose, paying attention to trim work is a worthwhile effort that pays off in many ways.
Preparation Before Painting
Proper preparation is key to achieving a successful and long-lasting paint job. Whether you’re painting an office, home, or commercial space, taking the time to prepare before painting can save you time, effort, and frustration. Here are the essential steps to ensure your project starts off right:
1. Gather Supplies: Before starting, make sure you have all the necessary supplies. This includes:
- Paint (in the chosen color and finish)
- Primer
- Brushes and rollers
- Painter’s tape
- Drop cloths or plastic sheeting
- Sandpaper
- Putty knife and spackling paste
- Clean cloths and a bucket of water
- Ladder or step stool
2. Clear the Area: Remove all furniture, decorations, and fixtures from the room or cover them with drop cloths to protect them from paint splatters. This will give you a clear and unobstructed area to work in, making the painting process more efficient.
3. Clean the Walls: Clean the walls thoroughly to remove dust, dirt, and grease, which can prevent paint from adhering properly. Use a mild detergent mixed with water and a clean cloth to wipe down the surfaces. Allow the walls to dry completely before moving on to the next step.
4. Repair Any Damage: Inspect the walls for any holes, cracks, or imperfections. Use a putty knife and spackling paste to fill in any holes or cracks. Once the spackle is dry, sand it down to create a smooth surface. This ensures that your paint job will look smooth and flawless.
5. Sand the Walls: Lightly sand the walls to remove any rough spots or previous paint drips. Sanding also helps the new paint adhere better to the surface. Be sure to wipe away any dust with a clean cloth after sanding.
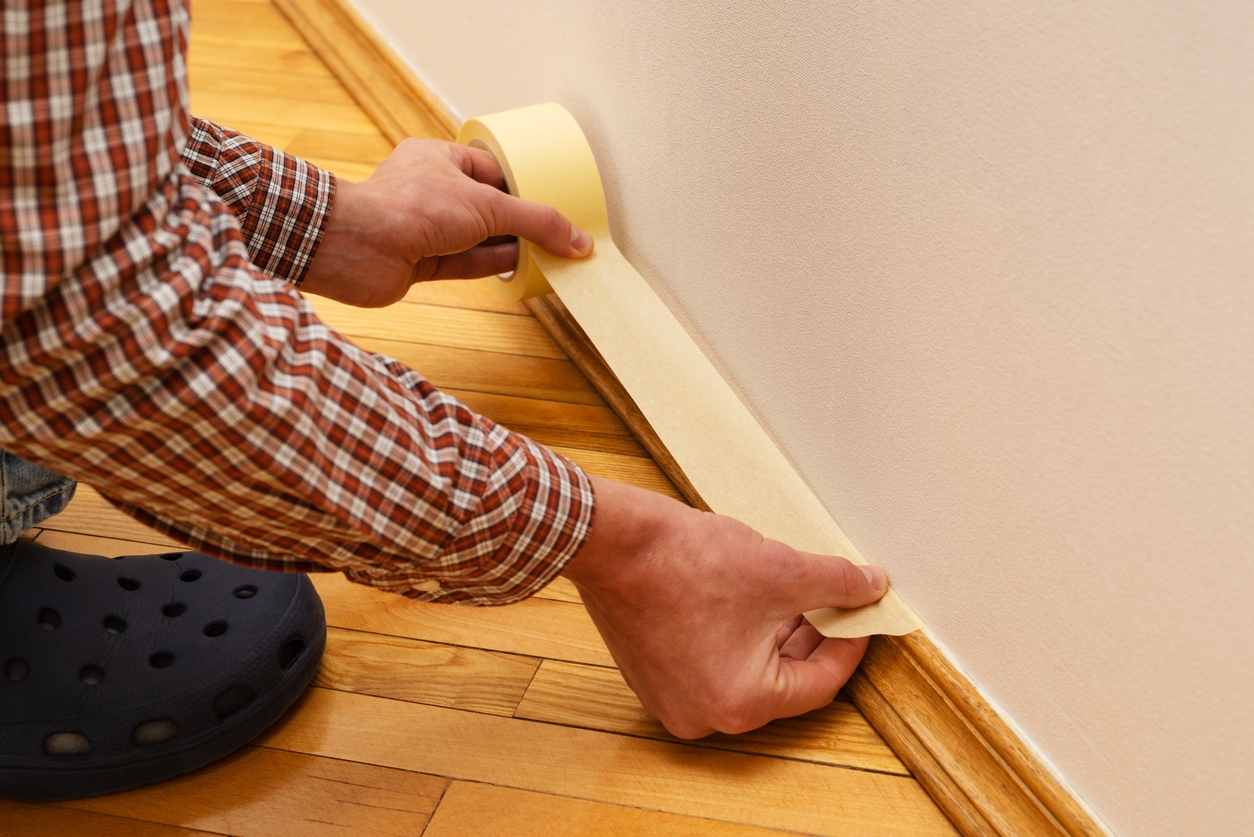
6. Protect Surfaces: Use painter’s tape to cover trim, baseboards, window frames, and any other surfaces you don’t want to get paint on. Lay down drop cloths or plastic sheeting to protect the floor and any remaining furniture. Properly taping and covering surfaces will save you from messy clean-ups later.
7. Prime the Walls: Applying a coat of primer is crucial, especially if you’re painting over a dark color, new drywall, or stained walls. Primer helps the paint adhere better and provides a uniform base for the topcoat. Allow the primer to dry according to the manufacturer’s instructions before painting.
8. Test the Paint: Before committing to a full paint job, test a small section of the wall with your chosen paint color. This allows you to see how the color looks in the room’s lighting and ensures you’re happy with your choice.
9. Plan Your Painting Strategy: Plan the order in which you’ll paint the room. Typically, it’s best to start with the ceiling, then move on to the walls, and finish with the trim. This helps prevent drips and ensures a cleaner, more professional finish.
10. Ventilate the Area: Ensure proper ventilation by opening windows and using fans. This will help the paint dry faster and reduce the fumes in the room, making it a more comfortable environment to work in.
By thoroughly preparing before you start painting, you’ll set yourself up for success. These steps help ensure that your paint job looks professional, lasts longer, and transforms the space effectively. Taking the time to prepare will make the actual painting process smoother and more enjoyable.
Choosing the Right Tools and Materials

Choosing the right tools and materials is crucial for achieving a professional-quality paint job. The proper equipment can make the process smoother, faster, and result in a more polished finish. Here are the key considerations when selecting your painting tools and materials:
1. Paint: Selecting the right paint is the first step. Consider the following factors.
- Type: Latex paint is water-based and easy to clean up, while oil-based paint is more durable and provides a smoother finish but takes longer to dry and requires solvent for cleanup.
- Finish: Choose a finish based on the room’s use and desired look. Common finishes include matte, eggshell, satin, semi-gloss, and gloss. High-traffic areas benefit from more durable finishes like satin or semi-gloss, while matte finishes are better for hiding imperfections.
- Color: Test different shades in your space to see how they look under various lighting conditions. Small paint samples can help you make an informed decision.
2. Primer: Primer is essential for a professional-looking paint job. It helps the paint adhere better and provides a uniform base, especially on new or previously painted surfaces or when painting over dark colors. Choose a primer suitable for your specific needs (e.g., stain-blocking primer for walls with marks or water damage).
3. Brushes: Quality brushes make a significant difference in the final outcome.
- Bristle Type: Synthetic bristles (nylon or polyester) are best for latex paint, while natural bristles (usually made from animal hair) work well with oil-based paints.
- Brush Size: A 2-2.5-inch angled brush is ideal for cutting in around trim and edges. Smaller brushes can be used for detailed work, and larger brushes for broad surfaces.
4. Rollers: Rollers are excellent for covering large areas quickly and evenly.
- Nap Length: The nap (or thickness) of the roller cover should match the texture of the surface you’re painting. A short nap (¼-inch) is best for smooth surfaces, while a medium nap (⅜- to ½-inch) works well for lightly textured walls. For rough surfaces, use a long nap (¾-inch or more).
- Roller Frame: Ensure the frame is sturdy and comfortable to hold. A roller with a longer handle or an extension pole can help reach high or difficult areas.
5. Painter’s Tape: High-quality painter’s tape helps achieve clean, sharp edges. Look for tape that is easy to apply and remove without damaging surfaces. Painter’s tape comes in various widths and is often color-coded for different uses, such as delicate surfaces or rough textures.
6. Drop Cloths and Plastic Sheeting: Protecting your floors and furniture is essential.
- Canvas Drop Cloths: Durable and reusable, these are great for protecting floors and providing a non-slip surface.
- Plastic Sheeting: Lightweight and disposable, plastic sheeting is ideal for covering furniture and fixtures.
7. Sandpaper and Spackling Paste: Prepare your walls by smoothing out rough spots and filling in holes or cracks. Have a range of sandpaper grits on hand, from coarse (for initial sanding) to fine (for smoothing).
8. Putty Knife: A good-quality putty knife is essential for applying spackling paste to fill holes and cracks. Choose a flexible blade for smooth application and a rigid blade for scraping.
9. Ladder or Step Stool: Safety and accessibility are important. Use a sturdy ladder or step stool to reach high areas. Ensure it is stable and tall enough for the job.
10. Paint Tray and Liners: A paint tray with disposable liners makes cleanup easier. Look for trays with deep wells and ridged areas to load paint evenly onto rollers.
11. Stir Sticks and Paint Can Opener: Properly mixing your paint is crucial for uniform color and consistency. Use stir sticks to mix the paint thoroughly before application. A paint can opener makes opening and closing cans easier without damaging the lid.
By investing in the right tools and materials, you’ll ensure a smoother, more efficient painting process and a professional-looking result. Quality tools not only make the job easier but also help achieve a durable, flawless finish that enhances the beauty and longevity of your painted surfaces.
Techniques for Clean Trim Lines

Achieving clean trim lines is essential for a professional-looking paint job. Here are some effective techniques to ensure your trim lines are sharp and precise:
Proper Taping Techniques to Prevent Bleeding
- Choose the Right Tape: Select high-quality painter’s tape designed for your specific surface. Look for tape that adheres well but can be removed cleanly without damaging the underlying surface. There are tapes designed for delicate surfaces, rough textures, and everything in between.
- Clean the Surface: Before applying tape, ensure the surface is clean and dry. Dust, dirt, and grease can prevent the tape from sticking properly and cause paint to bleed underneath.
- Apply Tape Firmly: Press the tape down firmly along the edges where you want clean lines. Use a putty knife or a plastic card to smooth the tape and ensure it’s securely adhered, especially along the edges. This helps prevent paint from seeping underneath.
- Use Shorter Lengths of Tape: Applying tape in shorter lengths rather than one long strip can help maintain better control and ensure it adheres properly along the entire length. Overlap the ends slightly to prevent gaps.
- Seal the Tape Edges: After applying the tape, run a damp cloth or your fingernail along the edges to seal them. This creates a barrier that helps prevent paint from bleeding under the tape.
Cutting In: How to Achieve Straight Lines
- Use an Angled Brush: An angled brush (also known as a sash brush) is designed for cutting in around trim, edges, and corners. Its shape allows for better control and precision.
- Load the Brush Properly: Dip the brush into the paint and tap off the excess. Avoid overloading the brush with too much paint, as this can cause drips and make it harder to control.
- Start Away from the Edge: Begin painting a short distance from the edge you’re cutting in. This allows you to get a feel for the brush and control the amount of paint on it before you approach the trim line.
- Use Smooth, Controlled Strokes: Slowly and steadily move the brush towards the edge, using smooth, controlled strokes. Hold the brush at an angle and use the narrow edge to create a clean line. It’s better to use several light strokes rather than trying to achieve full coverage in one pass.
- Keep a Steady Hand: Rest your hand against the wall or trim to keep it steady. Take your time, especially around corners and tight spots.
Using an Edger Tool for Precision
- Select the Right Edger: Edger tools come in various designs, including those with pads or rollers. Choose one that suits your comfort and the specific needs of your project. Look for edgers with adjustable guides or shields to help maintain straight lines.
- Load the Edger Evenly: Dip the edger tool into the paint tray and ensure it’s evenly loaded with paint. Avoid overloading to prevent drips and uneven application.
- Practice on a Scrap Surface: If you’re using an edger for the first time, practice on a scrap piece of wood or cardboard to get a feel for the tool and how it handles the paint.
- Start a Short Distance from the Edge: Begin a few inches away from the edge to ensure the edger is fully coated with paint before you approach the trim line. This helps avoid uneven lines or gaps.
- Use Smooth, Steady Movements: Guide the edger along the trim line with smooth, steady movements. Apply consistent pressure to ensure even paint application. If the edger has a guide or shield, keep it pressed firmly against the trim for a straight line.
- Clean the Tool Regularly: Paint can build up on the edges of the tool, affecting its performance. Clean the edger tool regularly during use to maintain precision and avoid smudges or uneven lines.
By following these techniques, you can achieve clean, crisp trim lines that give your paint job a professional finish. Proper taping, careful cutting in, and using an edger tool effectively can make a significant difference in the overall appearance and quality of your painted surfaces.
Dealing with Mistakes
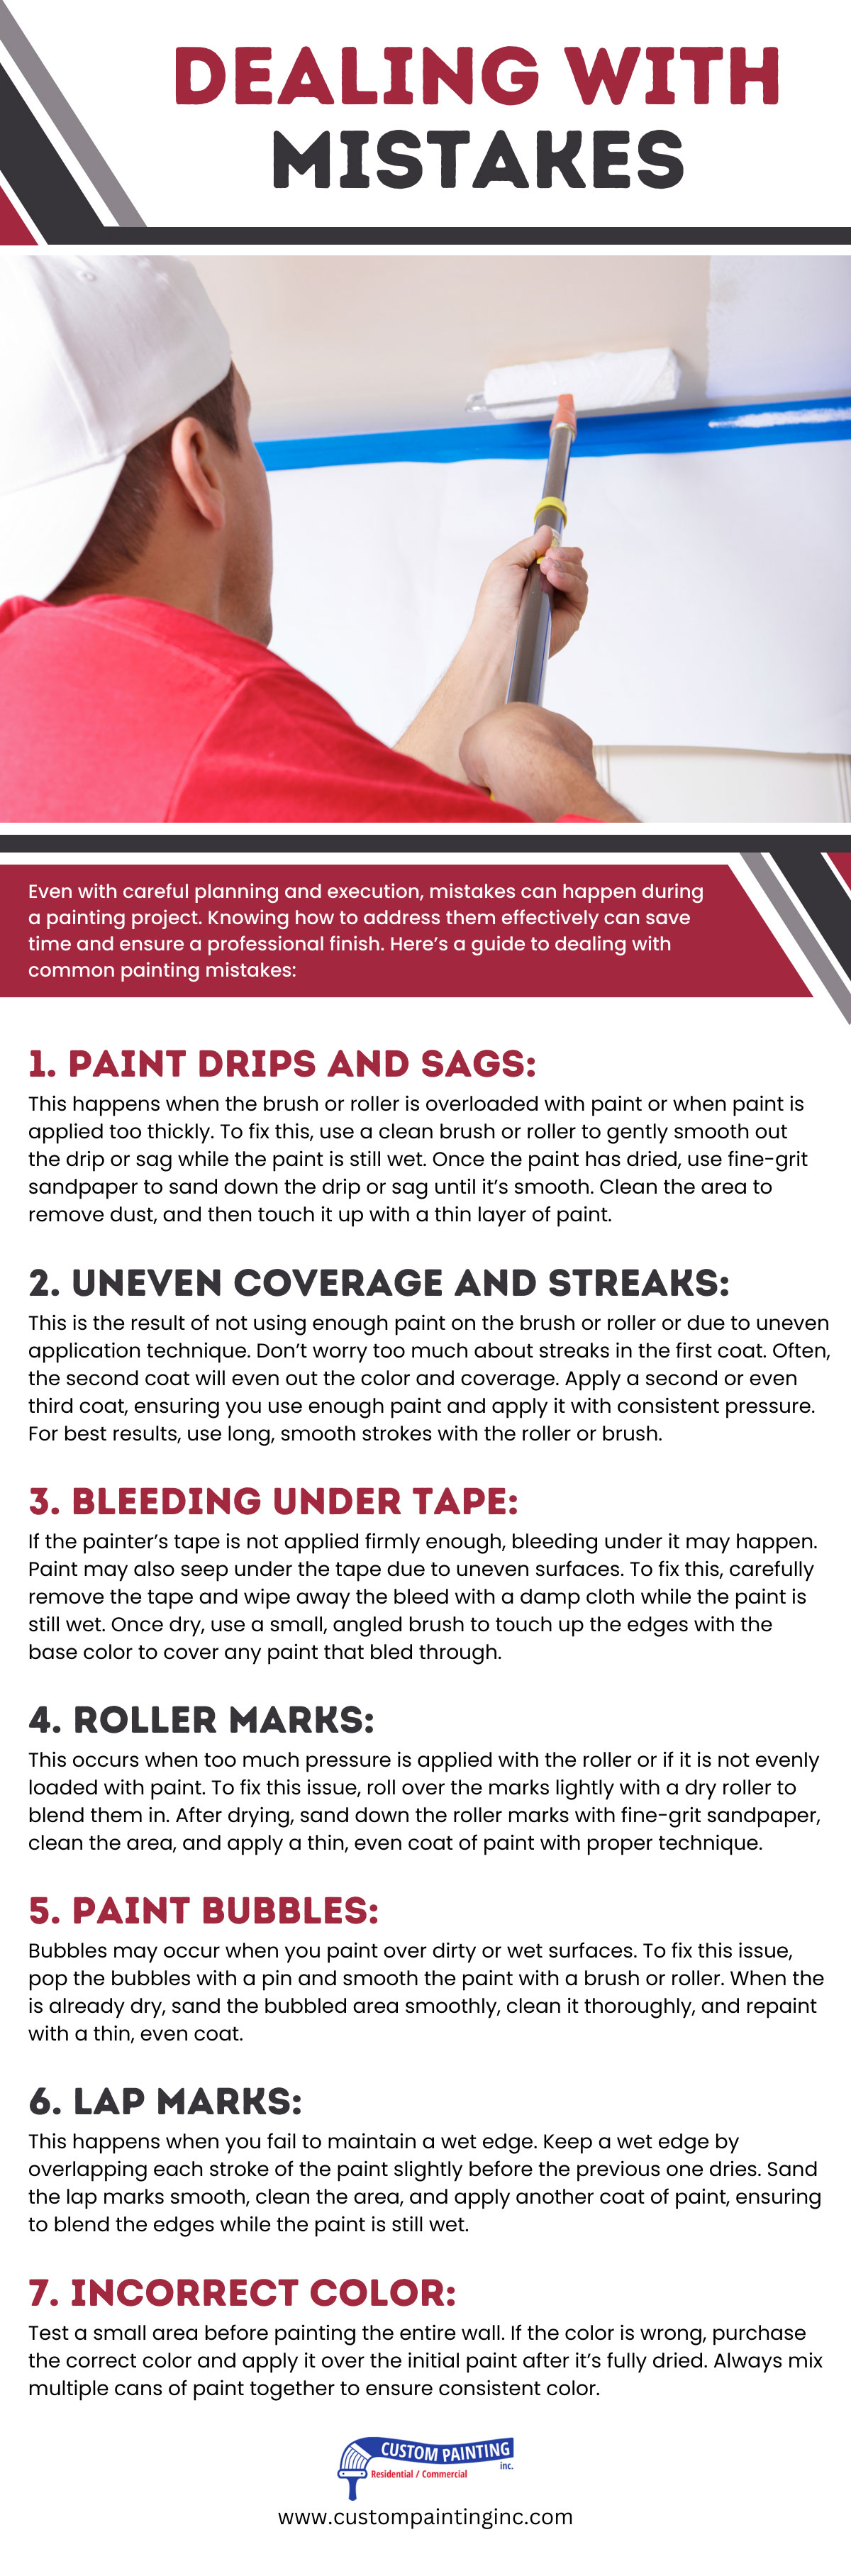
Even with careful planning and execution, mistakes can happen during a painting project. Knowing how to address them effectively can save time and ensure a professional finish. Here’s a guide to dealing with common painting mistakes:
- Paint Drips and Sags: This happens when the brush or roller is overloaded with paint or when paint is applied too thickly. To fix this, use a clean brush or roller to gently smooth out the drip or sag while the paint is still wet. Once the paint has dried, use fine-grit sandpaper to sand down the drip or sag until it’s smooth. Clean the area to remove dust, and then touch it up with a thin layer of paint.
- Uneven Coverage and Streaks: This is the result of not using enough paint on the brush or roller or due to uneven application technique. Don’t worry too much about streaks in the first coat. Often, the second coat will even out the color and coverage. Apply a second or even third coat, ensuring you use enough paint and apply it with consistent pressure. For best results, use long, smooth strokes with the roller or brush.
- Bleeding Under Tape: If the painter’s tape is not applied firmly enough, bleeding under it may happen. Paint may also seep under the tape due to uneven surfaces. To fix this, carefully remove the tape and wipe away the bleed with a damp cloth while the paint is still wet. Once dry, use a small, angled brush to touch up the edges with the base color to cover any paint that bled through.
- Roller Marks: This occurs when too much pressure is applied with the roller or if it is not evenly loaded with paint. To fix this issue, roll over the marks lightly with a dry roller to blend them in. After drying, sand down the roller marks with fine-grit sandpaper, clean the area, and apply a thin, even coat of paint with proper technique.
- Paint Bubbles: Bubbles may occur when you paint over dirty or wet surfaces. To fix this issue, pop the bubbles with a pin and smooth the paint with a brush or roller. When the is already dry, sand the bubbled area smoothly, clean it thoroughly, and repaint with a thin, even coat.
- Lap Marks: This happens when you fail to maintain a wet edge. Keep a wet edge by overlapping each stroke of the paint slightly before the previous one dries. Sand the lap marks smooth, clean the area, and apply another coat of paint, ensuring to blend the edges while the paint is still wet.
- Incorrect Color: Test a small area before painting the entire wall. If the color is wrong, purchase the correct color and apply it over the initial paint after it’s fully dried. Always mix multiple cans of paint together to ensure consistent color.
Maintaining Painted Trim
Maintaining painted trim is essential to keep your space looking fresh and clean. Proper care ensures the trim remains free of scuffs, chips, and dirt, prolonging the life of your paint job. Here are some tips for maintaining painted trim:
- Dust weekly with a microfiber cloth or vacuum brush.
- Wash periodically with mild detergent and a soft cloth; rinse and dry.
- Use furniture pads to prevent scuffs.
- Move furniture carefully to avoid bumps.
- Teach children and pets to handle trim gently.
- Touch up small chips and scratches with matching paint.
- Fix larger damage with spackling paste and repaint.
- Control humidity to prevent moisture damage.
- Check for and address water leaks promptly.
- Repaint every 3-5 years or as needed.
Conclusion
Achieving clean trim lines when painting your office requires careful preparation and the right techniques. By following these steps, you can ensure a professional finish. For professional assistance, call Custom Painting, Inc. at 925-866-9610 or fill out our contact form.
