Revamping your Sunnyvale home’s kitchen doesn’t have to mean a full renovation. Sometimes, all it takes is a fresh coat of paint to breathe new life into the space. Whether you’re looking to brighten up your cabinets, add a splash of color to the walls, or create a focal point with a bold accent, paint offers a budget-friendly and creative way to refresh the look of your kitchen. Renovating a Fremont area kitchen can often involve tasks such as wood rot repair, acoustic ceiling removal, wallpaper removal and more. Let us discover the best tips, tricks, and ideas to help you transform your kitchen with just a few strokes of a brush.
Choosing the Right Paint Colors
Selecting the perfect paint colors for your kitchen is a key step in creating a space that feels both stylish and welcoming. The colors you choose can influence the overall mood, make the room appear larger or cozier, and even highlight your kitchen’s best features. Below, we’ll explore current trends, timeless options, and practical tips for choosing colors that work harmoniously with your existing decor.
Trends and Timeless Color Options for Kitchens
- Current Trends: Soft, muted shades like sage green, dusty blue, and warm greys are trending, offering a calm, modern vibe. Bold choices such as navy, charcoal, and deep greens are also popular for creating striking accent walls or cabinetry.
- Timeless Choices: Classic colors like white, cream, and light grey remain ever-popular, providing a clean, fresh look that never goes out of style. These colors also serve as a versatile backdrop, allowing you to easily switch up decor and accessories over time.
How to Select Colors That Complement Existing Fixtures and Decor
- Consider Your Fixtures: Begin by evaluating the existing elements in your kitchen—countertops, backsplash, appliances, and flooring. For warm-toned fixtures (e.g., wooden cabinets or gold hardware), choose complementary warm colors like beige, taupe, or earthy greens. For cooler tones (e.g., stainless steel or grey surfaces), cooler paint colors such as blues, whites, or light greys will create a cohesive look.
- Balance and Harmony: Aim for a balanced color scheme that ties the room together. If your kitchen has a lot of patterns or textures, opt for more neutral or subtle paint colors to avoid overwhelming the space.
Tips for Using Color to Create a Desired Mood or Atmosphere
- Bright and Energetic: To create a lively, energetic space, consider vibrant hues like sunny yellow, turquoise, or even cheerful coral. These colors can make your kitchen feel more dynamic and inviting.
- Calm and Relaxed: For a soothing, relaxed atmosphere, choose soft, muted tones like pale blue, sage green, or warm neutrals. These colors can make your kitchen a peaceful retreat from the bustle of daily life.
- Bold and Dramatic: If you want to make a statement, consider dark, rich colors like navy blue, forest green, or deep charcoal. These shades add depth and drama, especially when used on cabinets or as an accent wall.
By carefully choosing the right paint colors, you can transform your kitchen into a space that not only looks great but also feels just right for your home.
Preparing Your Kitchen for Painting
Proper preparation is key to achieving a flawless finish when painting your kitchen. Before you even open a can of paint, taking the time to clean, prep, and protect your surfaces will ensure a smoother, more professional-looking result. In this section, we’ll walk you through the essential steps to get your kitchen ready for its fresh new look.
Steps to Clean and Prepare Walls, Cabinets, and Other Surfaces
- Cleaning: Start by thoroughly cleaning the surfaces you plan to paint. Grease, grime, and food splatters can prevent paint from adhering properly, leading to peeling or uneven coverage. Use a degreasing cleaner or a mixture of warm water and mild dish soap to wipe down walls, cabinets, and other surfaces. Rinse with clean water and let everything dry completely.
- Sanding: For a smooth finish, lightly sand walls and cabinets to remove any rough patches or old paint drips. Sanding also helps the new paint adhere better. Use fine-grit sandpaper for most surfaces, and remember to wipe away dust with a damp cloth after sanding.
- Filling Holes and Cracks: Inspect the walls and cabinets for any holes, cracks, or dents. Fill these imperfections with spackle or wood filler, depending on the material. Once dry, sand the filled areas smooth to create an even surface for painting.
Importance of Using Painter’s Tape and Drop Cloths for Protection
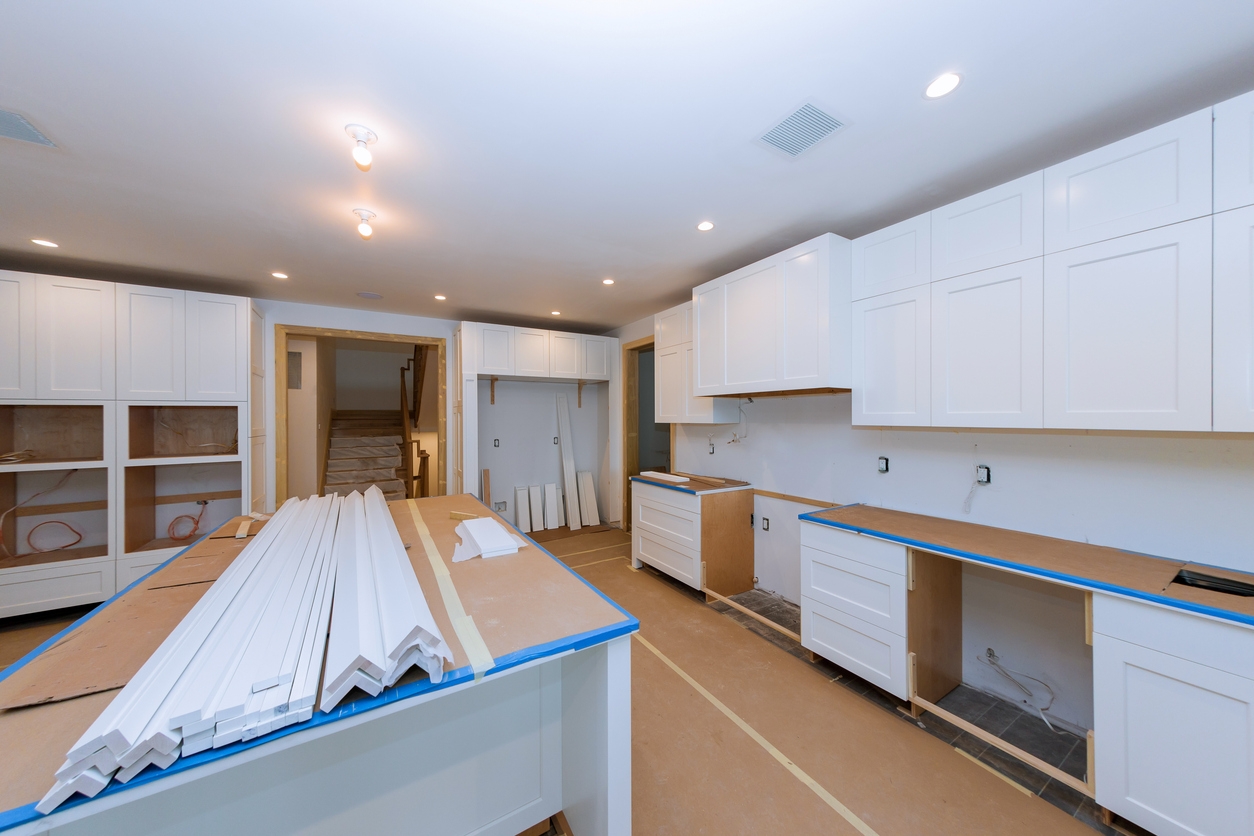
- Painter’s Tape: To achieve clean, sharp edges and protect areas you don’t want to paint, apply painter’s tape along baseboards, around door frames, and on the edges of cabinets and countertops. Be sure to press the tape down firmly to prevent paint from seeping underneath.
- Drop Cloths: Protect your floors, countertops, and any appliances from paint splatters by covering them with drop cloths or plastic sheeting. This simple step can save you from time-consuming cleanup later and prevent accidental damage to your kitchen surfaces.
Necessary Tools and Materials for a Smooth Painting Process
- Essential Tools: Gather the necessary tools before you start painting to ensure a smooth process. You’ll need paint rollers, brushes (including angled brushes for cutting in), a paint tray, and a stir stick. If you’re painting cabinets or trim, consider using a small roller or foam brush for more precise application.
- Materials: In addition to the paint itself, have primer on hand to create a base coat that will help the paint adhere and ensure a uniform finish. You’ll also need painter’s tape, drop cloths, sandpaper, spackle or wood filler, and a putty knife for prep work.
- Safety Gear: Don’t forget safety gear like gloves, a mask, and safety goggles, especially if you’re working with strong cleaners or sanding surfaces.
Painting Kitchen Walls
Painting your Newark, CA home’s kitchen walls is a great way to refresh the space and give it a new lease on life. However, kitchens come with unique challenges, such as working around appliances and ensuring the paint can withstand daily wear and tear. In this section, we’ll explore techniques for achieving a professional finish, offer tips for navigating tricky areas, and guide you in choosing the right type of paint for a kitchen environment.
Techniques for Achieving a Professional-Looking Finish
- Cutting In: Start by “cutting in” around the edges of the walls, which means painting a straight line along the corners, ceiling, and around fixtures. Use an angled brush for precision. This creates a border that your roller can blend into for a seamless finish.
- Rolling: Once you’ve cut in, use a roller to cover the larger wall areas. Apply the paint in a “W” or “M” pattern to avoid visible roller marks and ensure even coverage. Work in sections, maintaining a wet edge to prevent streaks.
- Multiple Coats: Don’t rush the process. Apply at least two coats of paint for the best coverage and color depth, allowing adequate drying time between coats as recommended by the paint manufacturer.
Tips for Painting Around Appliances, Cabinets, and Countertops
- Appliances: If possible, move appliances away from the walls before you start painting. If that’s not an option, cover them with drop cloths or plastic sheeting to protect them from splatters. Use a small brush to carefully paint the areas close to appliances, and consider using painter’s tape to create a clean edge.
- Cabinets: When painting around cabinets, use painter’s tape to mask off the edges and avoid getting paint on the cabinet surfaces. An angled brush will help you get into tight corners and along the edges of cabinets without making a mess.
- Countertops: Cover countertops with plastic sheeting or drop cloths to protect them from drips and splatters. Use painter’s tape to mask off the edges where the wall meets the countertop, and paint carefully along this line to ensure a crisp finish.
Choosing the Right Paint Type for Durability and Easy Cleaning
- Paint Finish: Kitchens are high-traffic areas that are prone to spills, splatters, and grease. Choose a paint finish that is durable and easy to clean, such as satin, semi-gloss, or high-gloss. These finishes are more resistant to moisture and stains, and they can be wiped down without damaging the paint.
- Paint Formulation: Look for paints specifically formulated for kitchens and bathrooms, as they often contain mildew-resistant properties and are designed to withstand frequent cleaning. Water-based latex paint is a popular choice due to its durability and ease of use, while oil-based paints, though more durable, are less common due to their longer drying times and stronger odors.
- Color Considerations: When choosing a paint color, consider how it will look in your kitchen’s lighting and how it complements your overall design. Lighter colors can make a small kitchen feel larger and more open, while darker colors add warmth and depth but may require more maintenance to keep looking fresh.
By following these techniques and tips, you can achieve a professional-looking finish that enhances the beauty and functionality of your kitchen. Choosing the right paint type ensures that your walls will stand up to the demands of a busy kitchen while remaining easy to clean and maintain.
Refreshing Cabinets with Paint
Painting your Mountain View home’s kitchen cabinets is a cost-effective way to give your kitchen a brand-new look without the expense of replacing them. Whether you want to lighten up the space or add a pop of color, a fresh coat of paint can make a dramatic difference. Here’s a step-by-step guide to painting your cabinets, along with tips on selecting the right paint and adding the finishing touches for a complete transformation.
Step-by-Step Guide to Painting Kitchen Cabinets
Preparation:
- Start by removing all cabinet doors, drawers, and hardware (handles, knobs, hinges). Label each piece to make reassembly easier later.
- Clean the cabinets thoroughly to remove grease, grime, and residue. Use a degreasing cleaner or a mixture of warm water and mild soap. Rinse and let dry completely.
- Sand the surfaces lightly with fine-grit sandpaper to create a smooth, paintable surface. This step is crucial for ensuring the paint adheres well. Wipe away the dust with a tack cloth.
- Apply painter’s tape to any areas you want to protect, such as the walls, countertops, or floors. Cover nearby surfaces with drop cloths or plastic sheeting.
Painting:
- Once the primer is dry, begin painting with your chosen paint. Start with the edges and corners using an angled brush, then use a small roller for the larger, flat areas.
- Apply the paint in thin, even coats to avoid drips and achieve a smooth finish. Allow each coat to dry thoroughly before applying the next. Typically, two to three coats will be needed for full coverage.
- After the final coat, let the paint cure for the recommended time before handling the cabinets.
Reassembly: Once the paint has fully dried and cured, reattach the cabinet doors and drawers. Reinstall the hardware or attach new handles and knobs for an updated look.
Selecting Paint Types and Finishes Suitable for Cabinets
- Paint Type: Choose a high-quality, durable paint that can withstand frequent use and cleaning. Acrylic latex paints are a popular choice for cabinets due to their durability and ease of use. They also offer a smooth finish that’s resistant to chips and scratches.
- Finish: The finish you choose will affect both the appearance and durability of your cabinets. Semi-gloss and satin finishes are ideal for cabinets because they’re easy to clean and resistant to moisture and grease. High-gloss finishes can create a sleek, modern look but will highlight imperfections more than lower-sheen options.
Adding Hardware and Finishing Touches for a Complete Makeover
- New Hardware: Updating the hardware on your cabinets can further enhance their new look. Consider replacing old handles and knobs with modern or decorative options that complement your kitchen’s style. Brushed nickel, matte black, and brass are popular finishes that can add a touch of elegance or modernity.
- Soft-Close Hinges: For a more functional upgrade, consider installing soft-close hinges on your cabinet doors. These hinges prevent doors from slamming shut and add a touch of luxury to your kitchen.
- Touch-Up Paint: Keep a small amount of paint on hand for touch-ups down the line. This will help maintain the fresh, new look of your cabinets by addressing any chips or scuffs that may occur over time.
By following these steps and selecting the right materials, you can transform your kitchen cabinets into a stunning focal point. The right paint and finishes, combined with stylish hardware, can give your kitchen a whole new personality, making it feel like a brand-new space.
Creative Paint Ideas for a Unique Kitchen Look
If you’re looking to add a touch of personality and creativity to your Sunolkitchen, paint offers endless possibilities beyond just the walls and cabinets. From accent walls to playful patterns, here are some innovative paint ideas that can help you achieve a unique and eye-catching kitchen design.
Accent Walls, Backsplashes, and Feature Areas
- Accent Walls: An accent wall is a simple yet effective way to add depth and interest to your kitchen. Choose a bold or contrasting color to paint one wall, creating a focal point that draws the eye. Consider placing the accent wall behind a dining area, around a window, or even on the wall where the stove or sink is located.
- Backsplashes: Instead of traditional tiles, consider painting your backsplash area for a custom look. A high-gloss or semi-gloss paint can mimic the reflective quality of tiles while offering easy cleaning. You can also experiment with color blocking or geometric designs to make your backsplash a standout feature.
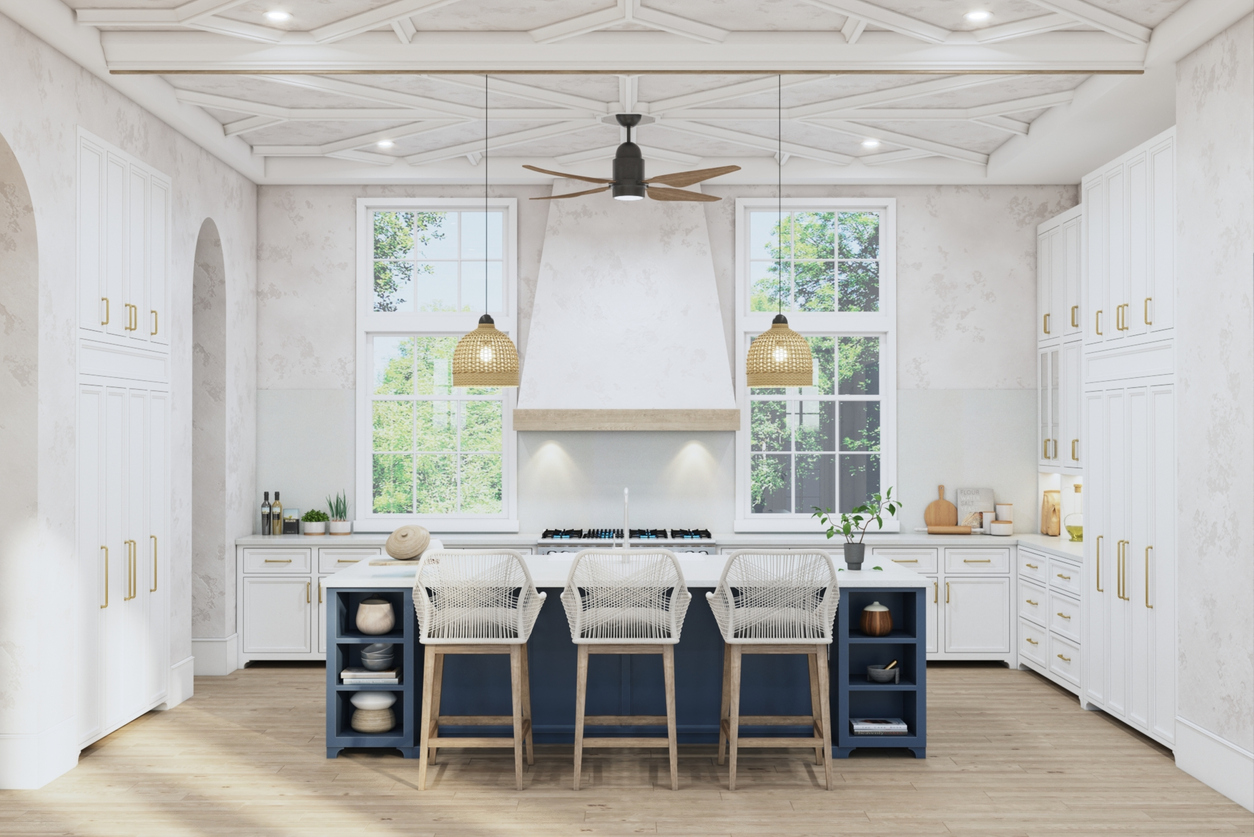
- Feature Areas: Highlight specific areas of your kitchen, such as an island, breakfast nook, or built-in shelving, by painting them in a different color from the rest of the room. This technique can help define spaces within an open-plan kitchen or simply add a fun pop of color.
Using Stencils and Patterns for Added Flair
- Stencils: Stencils are a fantastic way to introduce intricate designs and patterns into your kitchen without the need for wallpaper or tiling. You can use stencils to create a border around the room, add decorative elements to an accent wall, or even give your cabinets a unique touch. From Moroccan-inspired tiles to floral motifs, the possibilities are endless.
- Patterns: For a more dynamic look, consider painting patterns on your walls or cabinets. Stripes, chevrons, or geometric shapes can add visual interest and modernity. For a subtler effect, use tone-on-tone patterns with two shades of the same color, or go bold with contrasting colors for a striking appearance.
Incorporating Contrasting Colors and Finishes for a Modern Look
- Contrasting Colors: Playing with contrasting colors can give your kitchen a contemporary and vibrant feel. Pair light walls with dark cabinets, or vice versa, to create a dramatic contrast. You can also use contrasting colors on trim, doors, or islands to highlight architectural features and add a layered look to your kitchen design.
- Mixing Finishes: Combining different paint finishes can also elevate the style of your kitchen. For example, pair matte walls with glossy cabinets, or use a satin finish on the walls and a high-gloss finish for an accent area. This mix of textures adds depth and sophistication to the space, making it feel more custom and thoughtfully designed.
By exploring these creative paint ideas, you can transform your kitchen into a unique and personalized space that reflects your style. Whether you’re adding a bold accent wall, experimenting with patterns, or playing with contrasting colors, these techniques will help you create a kitchen that’s truly one of a kind.
Final Thoughts
Revamping your kitchen with a fresh coat of paint can completely transform the space, making it feel new and inviting. Whether you’re updating your walls, the cabinets, or adding creative touches, these painting ideas can help you achieve the look you want. If you’re ready to get started or need professional help, contact Custom Painting, Inc. at 925-866-9610 or reach out through our contact form. We’re here to help bring your vision to life!


