

Your Milpitas area home is one of your most significant investments, so it’s crucial to maintain it. Painting is one of the simplest, most economical, but most effective ways of maintaining and preserving your home’s appearance and structural integrity.
Painting protects your Sunol area home from the elements, preventing damage and decay. It also enhances its appearance and curb appeal, making it look fresh and well-cared for. You have to consider wood rot repair, doing exterior staining and other tasks for a perfect project.
But if your Fremont home has shutters, have you considered painting them? Shutters are often overlooked aspects of home painting. Painting the shutters can significantly impact your home’s overall appearance, adding a finishing touch that complements the main paint job and boosts your home’s visual appeal.
Why paint your shutters?
Here are the following good reasons to paint shutters:
1. Enhancing curb appeal: Freshly painted shutters can significantly improve the appearance of your home, making it look well-maintained and attractive.
2. Protecting shutters from weather damage: Paint protects the surfaces against the elements like rain, snow, and sun, preventing damage such as rotting, warping, or fading.
3. Extending Your shutters’ lifespan: By shielding the shutters from harsh weather and environmental factors, paint helps to prolong their durability and functionality, reducing the need for frequent replacements.
Choosing the right paint and color
Types of Paint Suitable for Shutters
1. Acrylic paint:
- Advantages:
-
-
- Quick-drying
- Durable and long-lasting
- Resistant to cracking and fading
- Easy cleanup with water
-
- Best for:
-
- Exterior shutters exposed to varying weather conditions
- Areas requiring frequent repainting
2. Latex paint:
- Advantages:
-
-
- Flexible and less likely to crack
- Fast-drying
- Easy to clean with soap and water
- Low VOCs (volatile organic compounds), making it more environmentally friendly
-
- Best for:
-
- Both interior and exterior shutters
- Homes in regions with mild weather
3. Oil-based paint:
- Advantages:
-
-
- Smooth, durable finish
- Superior adhesion
- Great for high-traffic areas and rough surfaces
-
- Best for:
-
- Wooden shutters that need a hard, durable finish
- Areas with high humidity or drastic temperature changes
Factors to consider when selecting colors

1. Complementing the house color:
- Contrast vs. blend:
-
-
- Choose colors that contrast nicely with the house’s main color to make the shutters stand out or blend harmoniously for a more subtle look.
- For example, if the house is light in color, darker shutters (e.g., navy blue, forest green, black) can create a striking contrast. Conversely, lighter shutters (e.g., white, light gray) work well with darker homes.
-
- Accent colors:
-
- Consider using the shutter color as an accent color found elsewhere on the house, such as in the trim, door, or roof.
- This approach can create a cohesive and balanced appearance.
2. Considering the architectural style:
- Traditional or colonial homes:
-
-
- Classic colors like white, black, dark green, and navy blue are timeless and complement traditional architectural styles.
-
- Modern or contemporary homes:
-
-
- Bold, bright colors (e.g., red, teal, mustard) can add a pop of personality and reflect modern aesthetics.
- Neutral shades (e.g., charcoal, gray, beige) can complement sleek, modern designs.
-
- Cottage or country homes:
-
- Pastel shades (e.g., light blue, soft yellow, mint green) or earthy tones (e.g., terracotta, sage green) can enhance the charm and coziness typical of these styles.
3. Neighborhood and environment:
- Consider the color scheme of neighboring homes to ensure your shutters complement the surrounding environment.
- If you live in a historic district, there may be guidelines or restrictions on paint colors to maintain the area’s character.
4. Personal preference:
- Choose a color that reflects your taste and style. Your home should reflect what you love and feel comfortable with.
When choosing paint for shutters, select a durable type of paint, like acrylic, latex, or oil-based, depending on the material and exposure of your shutters. The color choice should complement your home’s main color, align with its architectural style, and reflect your taste while considering the neighborhood and environment. Selecting the right paint and color thoughtfully can help you enhance your home’s curb appeal and overall aesthetic.
Preparation before painting
When preparing shutters for painting, a systematic approach ensures a smooth finish and long-lasting results. Here’s a breakdown of the key steps involved:
Cleaning the shutters
Before applying any paint, it’s crucial to thoroughly clean the shutters to remove dirt, dust, and any remnants of old paint.
- Removing dirt and dust: Start by wiping down the shutters with a damp cloth or sponge to eliminate surface dust. For more stubborn dirt, use a mild detergent mixed with water. Scrub gently but thoroughly to ensure all grime is removed.
- Removing old paint: If the shutters have old, peeling paint, it’s essential to remove it. Use a paint scraper or a wire brush to scrape off any loose paint. For areas where the paint is more stubborn, consider using a chemical paint stripper or sanding the surface until it’s smooth.
Repairing any damage
After cleaning, inspect the shutters for any signs of damage, such as cracks, holes, or loose parts.
- Fixing cracks and holes: Use wood filler or putty to fill in any cracks or holes. Apply the filler with a putty knife, smoothing it out so it’s flush with the surrounding surface. Once it’s dry, sand the area to achieve a smooth finish.
- Tightening loose parts: Check for any loose screws, hinges, or other parts. Tighten them or replace them if necessary. If the shutters are wooden and have warped or damaged slats, you might need to replace those slats or repair them with wood glue and clamps.
Priming the surface
Priming is a critical step that you should not overlook. It prepares the surface for paint, ensuring better adhesion and durability.
- Importance of primer: A good primer seals the surface, providing a uniform base for the topcoat. This is especially important if you’ve used fillers or sanded the surface, as these areas may absorb paint differently than the rest of the shutter. The primer also helps to block stains and prevent the wood from bleeding through the paint.
- Application: Apply the primer evenly across the entire surface of the shutters. Use a brush or roller that suits the size and detail of your shutters. Allow the primer to dry completely, following the manufacturer’s recommended drying time, before moving on to the topcoat of paint.
Follow these preparation steps carefully to create a smooth, durable base that enhances the final appearance and longevity of the paint on your shutters.
Painting techniques
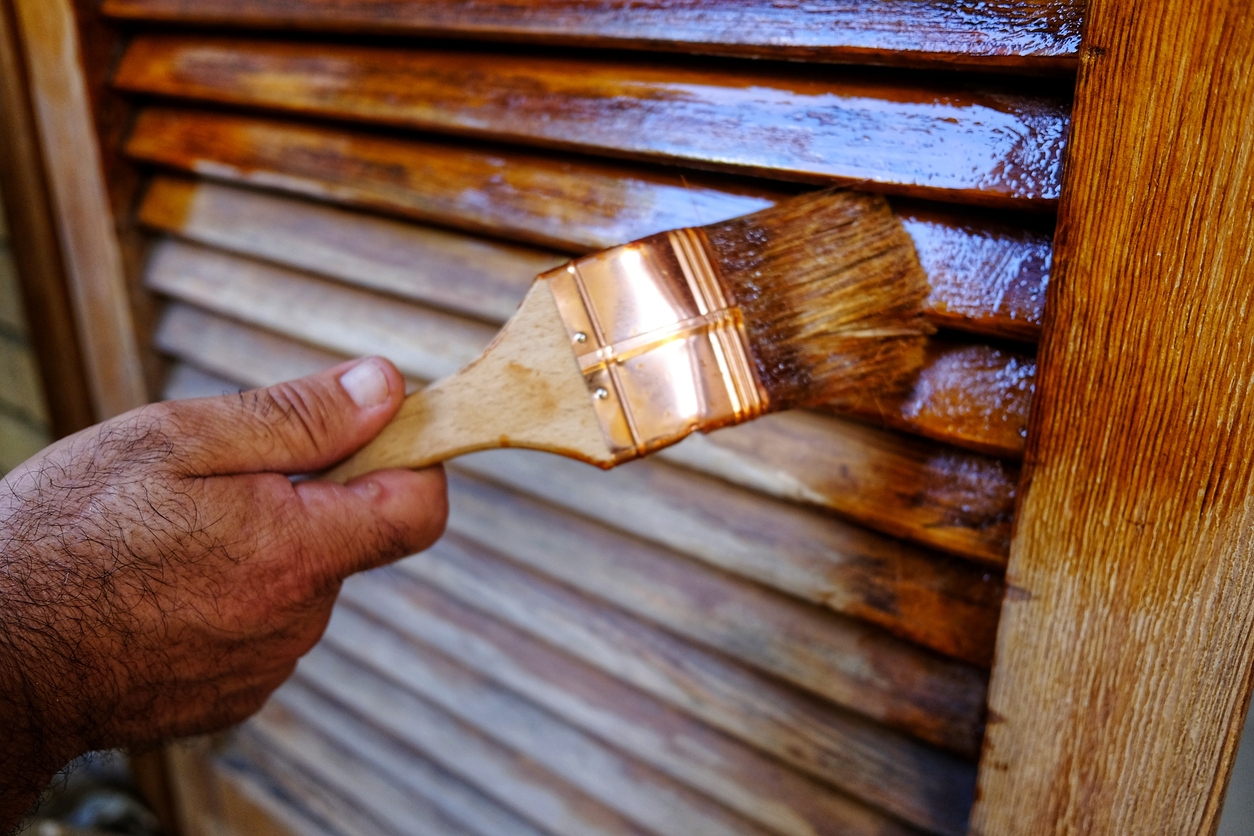
Painting shutters can enhance their appearance and protect them from weathering. Here’s a guide on the tools needed, the step-by-step process, and tips for achieving a smooth, even finish:
Tools for painting shutters
- Brushes: High-quality synthetic or natural bristle brushes, typically 2 to 3 inches wide, are ideal for detailed work on shutters, especially if they have slats.
- Rollers: Small foam rollers (around 4 inches) are great for applying paint on flat surfaces quickly and evenly.
- Spray paint: Use a paint sprayer or aerosol spray paint. It can be very effective for achieving a smooth and uniform finish, especially on shutters with intricate details.
- Primer: A high-quality primer is essential, especially if the shutters are bare wood or you’re making a drastic color change.
- Sandpaper: Fine-grit sandpaper (220 grit) can help smooth the surface before and between coats.
- Drop cloths and painter’s tape: Use them to protect surrounding areas from paint splatters.
- Safety gear: Masks, gloves, and goggles to protect against fumes and paint splashes.
Step-by-step painting process
Step 1: Preparation
- Remove the shutters: If possible, remove the shutters from the house to paint them. Doing so allows for easier access and a more even application.
- Clean the shutters: Clean the shutters thoroughly with soap and water to remove dirt, dust, and grease. Allow them to dry completely.
- Sand the surface: Lightly sand the shutters to create a smooth surface and to help the paint adhere better. If the shutters have old, flaking paint, remove it with a scraper and sandpaper.
- Apply primer: Apply a coat of primer to the shutters, especially if they are bare wood or metal. Primer helps the paint adhere better and ensures a uniform finish. Let the primer dry completely.
Step 2: Applying the first coat
- Brush application: If using a brush, paint the slats or detailed areas first. Then, paint the flat surfaces using long, smooth strokes. Avoid overloading the brush with paint to prevent drips.
- Roller application: If using a roller, roll the paint onto the flat surfaces of the shutters in a thin, even coat. Use a brush to reach into tight corners or detailed areas.
- Spray paint application: Hold the spray can or sprayer about 12-18 inches from the surface and apply light, even coats. Move the sprayer steadily across the surface to avoid overspray and drips.
Step 3: Drying time
- Drying: Allow the first coat to dry completely according to the paint manufacturer’s instructions. Drying usually takes 4 to 6 hours, but it may vary depending on the paint type and weather conditions.
Step 4: Applying additional coats
- Second coat: Lightly sand the surface with fine-grit sandpaper between coats to smooth out any imperfections. Wipe away any dust before applying the second coat.
- Final coat: Apply the final coat in the same manner as the first. Ensure coverage is even and check for any missed spots. Allow the final coat to dry thoroughly.
Tips for achieving a smooth and even finish
- Avoid overloading brushes or rollers: Apply paint in thin, even layers rather than thick coats, reducing the risk of drips and ensuring a smooth finish.
- Work in a dust-free environment: Dust and debris can stick to wet paint, so try to paint in a clean, well-ventilated area.
- Maintain a consistent distance with spray paint: When using spray paint, keep a consistent distance from the shutter surface to avoid uneven application.
- Check for drips and runs: Regularly inspect the shutters for drips and runs, especially when painting vertical surfaces. Brush them out immediately if noticed.
- Use quality paint and primer: Investing in high-quality paint and primer will provide a more durable, professional-looking finish.
Follow these steps and tips to help you achieve a smooth, even finish on your shutters, enhancing their appearance and durability.
Maintaining painted shutters
Maintaining shutters after painting them is essential to keep them looking fresh and ensure they continue to protect your windows effectively. Here’s a guide on how to maintain them:
Regular cleaning and inspection
- Routine cleaning: Clean your shutters at least twice a year to remove dust, dirt, and other debris that can accumulate and affect the paint. Use a mild detergent mixed with water and a soft cloth or sponge to clean the surface gently. Avoid using harsh chemicals or abrasive materials that can damage the paint.
- Inspection: During cleaning, inspect the shutters for signs of wear and tear, such as chipping, fading, or peeling paint. Also, check for any signs of moisture damage, mold, or mildew, especially if the shutters are exposed to the elements.
Touch-up techniques for minor damage
- Touch-up paint: Keep a small amount of the original paint used on your shutters for touch-ups. If you notice minor chips or scratches, lightly sand the damaged area with fine-grit sandpaper to smooth the surface, then apply the touch-up paint with a small brush. Allow it to dry completely before assessing if additional coats are necessary.
- Primer application: For areas where the paint has worn away to the bare material, apply a thin layer of primer before repainting. This step ensures better paint adhesion and protects the underlying material from further damage.
- Sealing: After touch-ups, consider applying a clear, weather-resistant sealant to protect the paint from UV rays and moisture. It is especially important for shutters exposed to direct sunlight or harsh weather conditions.
Repainting schedule
- Frequency: Shutters should be repainted every 3 to 5 years, depending on the exposure to elements and the quality of the original paint job. High-quality paints may last longer, but regular exposure to sun, wind, and rain can accelerate wear.
- Preparation: Before repainting, clean the shutters thoroughly, sand down the damaged areas, and prime them afterward. Remove old, flaking paint by sanding or using a paint stripper, especially if switching to a different color or type of paint.
- Painting process: When repainting, use a high-quality exterior paint suitable for the material of your shutters. Apply at least two coats, allowing sufficient drying time between each coat. If possible, remove the shutters from the windows for a more thorough and even paint job.
Follow these steps to maintain the appearance and longevity of your painted shutters, ensuring they remain an attractive and functional part of your home.
Conclusion
When painting your house, don’t overlook the impact of well-painted shutters. They can add character, enhance curb appeal, and tie together the overall look of your home.
If you’re ready to refresh your home’s exterior, contact Custom Painting, Inc.’s paint experts today to bring your vision to life with expert craftsmanship and attention to detail. Call us at 925-866-9610 or message us here to request a free, no-obligation estimate.
